
Tips on overcoming common challenges of constructing decorative hardscapes on hilly terrain.
By Tom Ralston
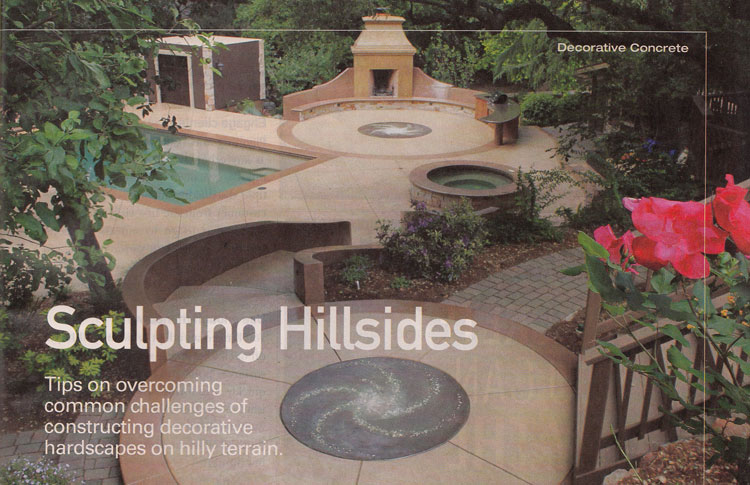
This upper view of the Pott project shows two "lumi lumi" luminescent concrete medallions that glow in the dark. Photo: Ryan Huebel
From changing elevations to drainage and erosion issues to stumbling upon shale rock or sand, building decorative concrete into a hillside involves a lot of unknowns and unexpected costs. The Pott Residence in Saratoga, Calif., for instance, was a 4,200-square-foot residential hardscape with twists and turns from the start. We had to bid and re-bid five times, presenting various sets of plans and even more ideas. I designed much of the hardscape myself to move the project forward. We also faced challenges that any contractor should expect when working with hills, as illustrated below.
Bid, estimate right
Hillside project costs are hard to estimate. You need accurate elevation plans from an architect or civil engineer to even know how much concrete will be used. In many cases you won't have access to such information, and the client may be unwilling to hire soil engineers, surveyors, or civil engineers to produce a detailed plan that includes, for example, stair locations and retaining wall heights. A certain amount of due diligence is required before estimating the hillside project.
For the Pott project, the original plans from the building architect had minimal hardscape plans and another from a landscape architect was missing details for elevations, footing sizes, wall heights, etc. We had to lay out walls and perimeters and send a foreman and an estimator to shoot grades. In this way, we established wall heights, which then led to specifying footing widths and depths and laying out the final shape of the walls. Only then were we able to calculate costs.
It's also never a bad idea to overestimate costs, as most hillside projects tend to go over budget due to dealing with unknowns like soil conditions. Although it's best to bill on a time and material basis for these types of projects, hardly anyone wants to do that.
Editor's note: This article is based on one of many projects and techniques highlighted in the author's newly released book Sculpting Hillsides with Decorative Concrete. Find it at http://go.hw.net/sculptinghillsides.
Engage Clients
Planning and visualizing is as important as any other aspect of a job. customer input is equally as important. Have multiple discussions and meetings with the customer from the first visit, and be prepared to redesign to suit client needs. Provide samples with various colors and textures. Like Goldilocks, the client will pick those that are just right for them.
Use enough manpower
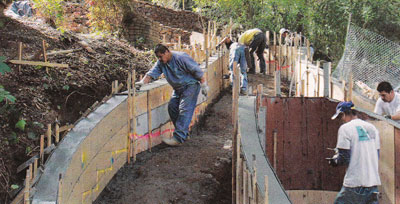 Workers pull stakes, cut wires, and unfasten screws and nails before stripping wall forms. Photo: Tom RalstonYou'll need an adept crew, and all hands on deck to properly set forms for vertical surfaces, pour structural elements, and quickly strip forms to add decorative finishes. In the case of the Pott project, some walls needed to be stripped, colored, and finished all in the same day (actually in a few hours).
Don't just guess. I have spent years tracking special "place and finish" labor requirements so I can calculate costs and labor for my projects. We use a metrics log based on the jobsite data I've collected to determine what type of labor is needed to provide a stellar finish. For example, I've found that most walls have a metric of one man per 80 square feet.
Make structural walls decorative
You'll need to set wall forms and reinforcing to allow quick and easy removal, so walls can be stipped early, colored, and finished. My crews use special formwork with tie wires and bracing that enable forms to be snugly fastened while also allowing a quick release. The wire is never twisted, and is looped so that it can be pulled through the formwork; the forms are braced above the top board so that an edger can slide underneath to provide a clean, radius edge.
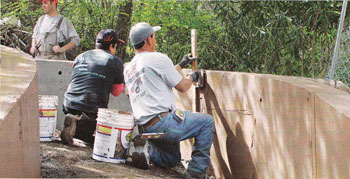 Unse a level to make deep joints in walls for a great straight edge that reads plumb. Photo: Tom RalstonThe Pott project's colored concrete walls cascade down the upper hillside where the home rests. Some walls encase stairs that split around a Japanese maple, with one stairway leading to the pool and the other to the bocce ball court, Jacuzzi, and barbeque area. The remaining walls curve horizontally and vertically to retain the hill's soil. The walls that meander arouhnd stairways were poured monolithically with the footings. Because the forms had to bend in two direction simultaneously to accommodate the hill's vertical rise and horizontal curvature, many were cut into wedge shapes. Picture domed house construction with all the triangles that were used to make the bends, and you'll see that we were operating under the same principle.
We finished the walls with a hard trowel texture. The crews troweled color hardener into the concrete while the walls were still supple and soft. This technique requires precise timing and the hands of an artist with a brush, or trowel. The wall surfaces were troweled repeatedly to produce movement in color, for an oil-painted look and a smooth, butter-like surface.
Build for comfort
For outdoor living spaces, you'll need to find ways to marry form with function. Your job is to transform bland backyard slopes into enticing - and, yes, comfortable - gateways.
Find additional project pictures and details at www.concretesurfacesmag.com.
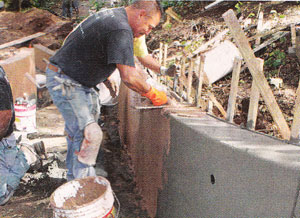 Crew members troweled color hardener mixed like stucco onto walls to provide a beautiful hard-troweled finish. Photo: Tom RalstonOur project included seat walls curving out from the fireplace, which is in a central location for family and social gatherings. The fireplace and walls were built in a low spot on the property, and from the low side the walls are over 6.5 feet tall. On the front patio and pool deck side, they are 4.5 feet tall at their highest point. As with the structural walls, we used a forming system that enabled us to strip quickly and produce the desired color and texture.
The seats have three different curvatures. From each side of the fireplace they curve and outstretch horizontally. They also gently curve downward and vertically. The backs of the walls curve in a concave fashion, which allows the back and spine to comfortably nestle into what would ordinarily be just a straight and far less comfortable concrete wall.
Hard work pays off!
It took 13 months to build a large driveway and columns with ledger stone cladding; swimming pool with deck and patio; cabana-like guest house; meandering walls; and large Rumford fireplace with unique concrete seating. Finishes include polished countertops, Monet-finished walls, a stamped pool deck, hard-troweled bands and pool coping, and glow-in-the-dark aggregate artfully strewn to look like the Milky Way. Our time and effort paid off earlier this year when our project won a first-place Decorative Concrete Council Award for Cast-In-Place Special Finishes, Under 5000 Square Feet and also the WOW! Award for best project of the year.
Tom Ralston is owner of Tom Ralston Concrete in Santa Cruz, Calif.
